
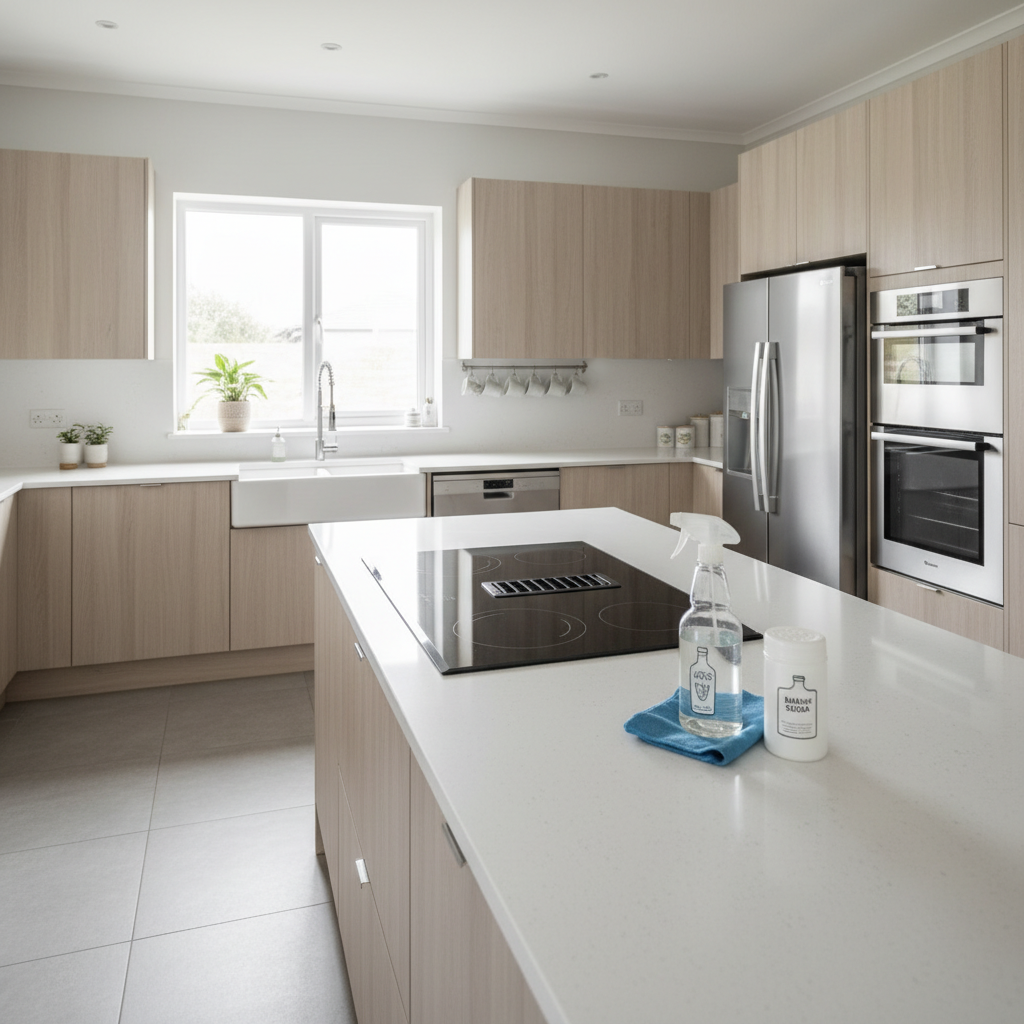
Cleaning a stove top with baking soda is the safe, mildly abrasive method of lifting grease, burnt-on food, and stains using a simple paste and dwell time. It relies on sodium bicarbonate’s gentle scrubbing action and alkalinity to break down residue. In Saskatoon kitchens, this DIY approach keeps appliances fresh between HAARSH KLEAN maintenance visits.
By Harsh Kewlani — Founder, HAARSH KLEAN
Last updated: May 11, 2026
Overview and why baking soda works
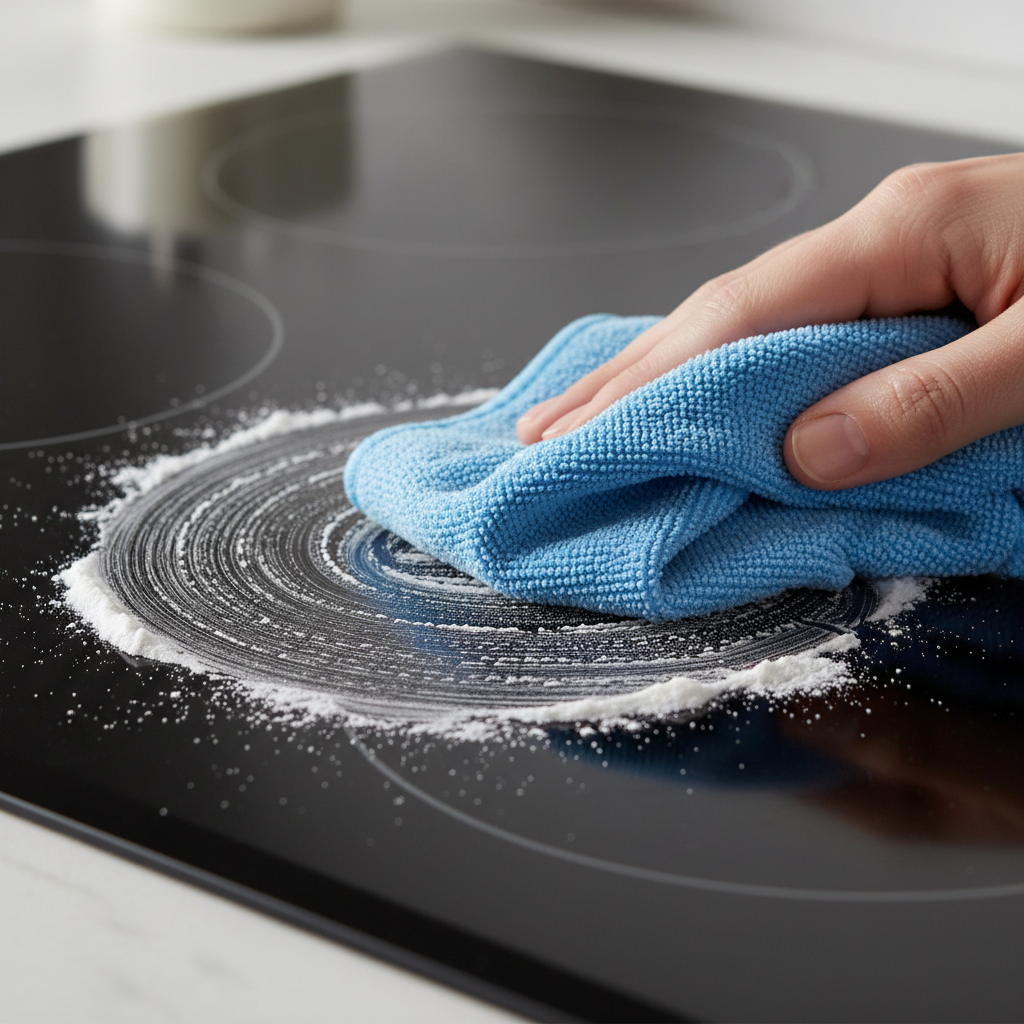
Baking soda cleans stovetops by combining mild abrasion with an alkaline pH that loosens grease. A paste (2:1 powder to water) plus 10–20 minutes of dwell time softens stuck-on messes so they wipe away with a microfiber cloth. It’s safe for most glass, enamel, and steel surfaces.
Baking soda is our go-to between professional cleanings because it’s effective, inexpensive, and gentle on finishes. Unlike aggressive scouring powders, it won’t carve micro-scratches if you let the paste do the work. On glass-ceramic, the particles break down as you rub, reducing the risk of haze.
- Use a 2:1 baking soda-to-water paste for routine messes; thicken to 3:1 for scorched spots.
- Let the paste dwell 10–20 minutes; extend to 30–40 minutes for carbonized spills.
- Always wipe with damp microfiber, then buff dry to prevent mineral streaks.
In our experience cleaning Saskatoon homes, consistent, light maintenance wins. A weekly five-minute pass keeps rings from baking on. When the stove fights back, choose one of the targeted methods below.
Quick summary
For routine cleanup, spread a baking soda paste, wait 10 minutes, then wipe and buff. For heavy grime, upgrade to a vinegar foam lift or a hydrogen peroxide gel and give it 20–30 minutes. Remove gas grates to soak separately so the cooktop wipes clean in fewer passes.
- Primary method: 2:1 baking soda paste + 10–15 minute dwell.
- Heavy spills: add warm water steam or vinegar fizz to lift residue faster.
- Gas ranges: soak grates and caps; keep igniters dry at all times.
- Glass tops: avoid razor blades unless manufacturer approves; rely on paste + microfiber.
- Finish up: rinse cloths often and buff dry to a streak-free shine.
Quick comparison table
These 11 baking-soda-based methods balance speed, safety, and cleaning power. Use the table to match mess type to method. Start with the top pick for everyday grime; jump to stronger pairings for burnt sugar, sticky oils, or carbonized rings.
| Method | Best for | Dwell time | Scrub level | Odor/ventilation | Surface notes |
|---|---|---|---|---|---|
| Top Pick: Baking soda paste (2:1) | Everyday grease, light rings | 10–15 min | Low | Neutral | Safe on glass, enamel, steel |
| #2 Vinegar foam lift | Sticky oils, fresh spills | 5–10 min | Low | Vinegar smell | Avoid aluminum trim |
| #3 Hydrogen peroxide gel (1:1) | Scorched rings, light carbon | 15–25 min | Low–Medium | Mild | Spot test paint |
| #4 Dish soap degreaser | Heavy grease film | 10–20 min | Low | Fresh scent | All surfaces |
| #5 Lemon boost | Odor control, light stains | 5–10 min | Low | Citrus | Avoid on marble |
| #6 Castile soap blend | Eco-focused homes | 10–15 min | Low | Mild | All surfaces |
| #7 Steam + paste | Old, dried spills | 5–10 min | Low | Neutral | Keep electronics dry |
| #8 Grate soak (gas) | Burner grates, caps | 20–40 min | Medium | Neutral | Do not soak igniters |
| #9 Baking soda + salt | Tough baked sugar | 10–15 min | Medium | Neutral | Test on glass |
| #10 Overnight poultice | Stubborn scorch marks | 6–8 hours | Low | Neutral | Cover to prevent drying |
| #11 Spot-lift with alcohol | Sticky residues | 1–3 min | Low | Ventilate | Keep from flames |
How to clean a stove top with baking soda: our top pick
Make a thick baking soda paste (2 parts powder, 1 part warm water), spread it over greasy rings, wait 10–15 minutes, then wipe with a damp microfiber and buff dry. This low-effort routine clears everyday messes on glass, enamel, and stainless steel without scratching.
This is the exact method we recommend between HAARSH KLEAN visits. It’s fast, repeatable, and gentle on cooktops in apartments, condos, and family homes. Here’s the precise playbook we teach Saskatoon clients.
- Power down and cool: Ensure the surface is cool to the touch (under 95°F) before cleaning.
- Mix paste: 2 tablespoons baking soda + 1 tablespoon warm water; thicken as needed to frosting consistency.
- Apply: Spread 1–2 millimeters thick over stains. Avoid control seams and igniters.
- Dwell: Wait 10–15 minutes; for stubborn rings, extend to 20–30 minutes.
- Wipe: Use a damp microfiber in circular passes. Rinse and wring cloth often.
- Detail: Use a nylon scraper at a shallow angle for hardened spots; keep pressure light.
- Rinse and buff: Wipe with clean water, then dry and buff with a second cloth for a streak-free finish.
If you’ve inherited baked-on residues from previous tenants, repeat once more or jump to the peroxide gel below. On gas units, treat grates and caps separately for best results.
The lineup: 11 proven baking soda stovetop methods
From simple paste to overnight poultice, these baking-soda-based methods target specific messes without harsh abrasives. Choose the lightest method that works, escalate only as needed, and always finish with a damp wipe and dry buff to prevent streaks or film.
#2 Vinegar foam lift (for fresh, sticky spills)
- Why it works: The fizz helps mobilize oils while bicarbonate gently scrubs.
- Mix: Dust baking soda, then lightly mist white vinegar; let it foam for 5–10 minutes.
- Action: Wipe with a damp microfiber; repeat on gummy spots.
- Tip: Keep vinegar away from bare aluminum or natural stone trim.
We use this right after cooking splatters to stop polymerized oils from forming hard rings. The short dwell keeps your nightly reset under five minutes.
#3 Hydrogen peroxide gel (for scorched rings)
- Why it works: Peroxide (3%) breaks down browned residues while baking soda provides slip.
- Mix: 1:1 baking soda to 3% hydrogen peroxide; aim for a spreadable gel.
- Dwell: 15–25 minutes, then wipe gently. Repeat for carbonized edges.
- Safety: Spot test painted trim; keep away from natural stone.
We reserve this for circular scorch marks that resist standard paste. On glass tops, keep strokes light and finish with a pure-water rinse.
#4 Dish soap degreaser (for heavy film)
- Why it works: Surfactants in soap cut grease; baking soda boosts slip and mild abrasion.
- Mix: 2 tablespoons baking soda + 1 teaspoon dish soap + 1 tablespoon warm water.
- Dwell: 10–20 minutes; agitate with a soft sponge.
- Rinse: Wipe with clean water twice to remove film; buff dry.
Busy families with frequent frying love this blend. It clears that invisible film that makes glass tops look cloudy under window light.
#5 Lemon boost (for light stains and odors)
- Why it works: Citric acid helps brighten; baking soda supplies gentle scrub.
- Mix: 2 tablespoons baking soda + 1 tablespoon lemon juice to form a light foam.
- Dwell: 5–10 minutes, then wipe. Repeat on light tea-colored stains.
- Note: Avoid contact with marble, limestone, or travertine backsplashes.
Great for end-of-week refreshes in condos where fragrance-free cleaners are preferred. The citrus note dissipates quickly with ventilation.
#6 Castile soap blend (eco-forward routine)
- Why it works: Plant-based soap lifts oils while baking soda adds body.
- Mix: 2 tablespoons baking soda + 1 teaspoon liquid castile soap + 1 tablespoon warm water.
- Dwell: 10–15 minutes; wipe with a damp microfiber.
- Finish: A second rinse prevents any matte film.
We suggest this to eco-conscious Saskatoon homeowners who request greener options during routine cleaning.
#7 Steam assist + paste (for dried rings)
- Why it works: Warmth softens residues so paste can penetrate.
- Steps: Place a hot, damp towel on the stain for 2–3 minutes, remove, then apply baking soda paste.
- Dwell: 5–10 minutes post-steam; wipe gently.
- Caution: Keep water out of control seams and away from igniters.
This saves elbow grease on old, neglected spills we often encounter during move-in cleanings.
#8 Grate and cap soak (gas ranges)
- Why it works: Soaking loosens carbon; baking soda raises pH to saponify oils.
- Mix: 1/4 cup baking soda in 1 gallon hot water; submerge grates and caps 20–40 minutes.
- Scrub: Use a nylon brush; rinse thoroughly and dry completely.
- Critical: Never soak or flood the igniters or gas orifices.
Handle grates in a sink or tub and the stovetop clears in minutes. Reassemble only when parts are fully dry.
#9 Baking soda + salt (extra bite)
- Why it works: Salt adds angular grit for baked sugars and caramelized spots.
- Mix: 1 tablespoon fine salt + 2 tablespoons baking soda + 1 tablespoon water.
- Dwell: 10–15 minutes; very light pressure when scrubbing glass.
- Note: Test first; skip if your glass top already shows haze.
We use this sparingly, usually on enamel or steel rings—rarely on pristine glass.
#10 Overnight poultice (for stubborn scorch)
- Why it works: Extended contact softens carbon without hard scraping.
- Mix: Thick 3:1 paste; cover with plastic wrap to slow drying.
- Dwell: 6–8 hours; remove wrap, re-wet, and wipe away in the morning.
- Finish: Rinse cloths thoroughly and buff dry.
This is our last DIY escalation before tools like specialty glass-top scrapers approved by manufacturers.
#11 Spot-lift with rubbing alcohol (sticky residues)
- Why it works: Alcohol dissolves adhesives; baking soda provides gentle traction.
- Steps: Apply paste to spot, add a few drops of isopropyl alcohol, agitate lightly.
- Dwell: 1–3 minutes; wipe and immediately rinse the area.
- Safety: Ventilate and keep away from flames and hot surfaces.
Useful for tape residue or sugary spills that smear instead of lifting with water alone.

How to choose the right baking soda method
Match method to mess: use plain paste for light grease, add vinegar foam or dish soap for sticky oils, and choose peroxide gel or an overnight poultice for scorched rings. On gas ranges, soak grates separately and protect igniters from moisture.
Identify your surface and soil
- Glass-ceramic tops: Favor paste, gel, and microfiber; keep pressure light and avoid gritty mixes.
- Enamel/steel: Tolerate more agitation; salt blends and nylon brushes are usually safe.
- Gas vs. electric: Remove parts you can soak; keep electrics and igniters dry.
Decide your dwell and agitation
- Light mess: 10-minute dwell + light wipe.
- Heavy grease: 15–20 minutes + dish soap or vinegar foam.
- Scorch/carbon: 20–30 minutes or overnight poultice + nylon scraper.
Tools we rely on at HAARSH KLEAN
- Two microfiber cloths (one damp for lift, one dry for buff).
- Soft sponge and nylon scraper (shallow angle only).
- Small detailing brush for control knobs and seams.
- Spray bottle with distilled water to minimize mineral streaks.
Local considerations for Saskatoon
- Winter dryness can leave mineral specks from tap water on glass tops—use distilled water for the final rinse to keep that streak-free look.
- Holiday cooking spikes grease; schedule a deep cleaning right after big gatherings to prevent carbonized rings that need overnight treatment.
- In rental turnovers, document before/after photos of the cooktop and grates—helpful when coordinating between-tenant deep cleans.
Buying guide: supplies and safety you’ll actually use
You only need baking soda, microfiber cloths, a soft sponge, and a nylon scraper for most stovetop cleanups. Add a spray bottle, gloves, and a small brush for edges. Keep igniters dry, ventilate lightly with alcohol or vinegar, and always buff dry to finish.
Core supplies
- Baking soda in a shaker or jar with spoon.
- Microfiber cloths (2–3 per session) for lift and buff.
- Soft sponge and nylon scraper for cautious agitation.
- Spray bottle (distilled water for final rinse on glass).
- Gloves for peroxide and alcohol spot work.
Safety checklist
- Always work on a cool surface and block power/gas if detailing around igniters.
- Ventilate when using vinegar or alcohol; keep away from open flame.
- Rinse and dry thoroughly—leftover film attracts dust and dulls shine.
For professional appliance cleaning, our team handles ovens, microwaves, and refrigerators alongside your cooktop during the same visit for a consistent, like-new finish.
Step-by-step stovetop reset checklist
In 12 minutes, you can reset most cooktops: remove loose debris, paste, dwell 10 minutes, wipe, detail edges, then buff dry. Add a 20–40 minute soak for gas grates while the paste works, and reassemble only when parts are fully dry.
- Clear crumbs and debris with a dry microfiber (30 seconds).
- Shake on baking soda; mist with water or spread paste (1 minute).
- Set a 10-minute timer for dwell; meanwhile, soak gas grates (optional).
- Wipe in overlapping circles; rinse cloth often (3 minutes).
- Detail seams and knobs with a small brush (2 minutes).
- Rinse with clean water and buff to a streak-free finish (2 minutes).
Do this once a week and you’ll avoid most scraping or overnight treatments entirely.
Safety, surface notes, and when to escalate
Stay gentle on glass, protect igniters on gas ranges, and escalate only when needed: vinegar foam for sticky oils, peroxide gel for scorch, or an overnight poultice for deep carbon. If stains persist after two cycles, consider a professional deep clean.
- Glass-ceramic: Avoid gritty abrasives; prefer paste, microfiber, and patient dwell.
- Enamel/steel: More forgiving but still use nylon, not metal scrubbers.
- Gas components: Keep water and cleaners off igniters and electrical parts.
For tough commercial-style grease buildup background, see industry-grade techniques similar to those discussed on commercial oven deep cleaning methods. While your home cooktop needs gentler care, the principle of dwell time over force remains the same.
Need a hand between big cooks?
If your stovetop needs more than a quick reset, we can help. HAARSH KLEAN’s appliance cleaning pairs your cooktop with oven, microwave, and fridge care in one visit—ideal after holidays or move-outs. Evening and weekend slots keep your week on track.
We’re a local, owner-operated team serving Saskatoon. Our Appliance Cleaning and Deep Cleaning services include inside-oven care, microwave degreasing, refrigerator shelves and bins, plus glass-top polishing. We bring all supplies, offer eco-friendly options, and back work with a 100% satisfaction guarantee.
FAQ: Cleaning a stove top with baking soda
Use a baking soda paste for everyday messes, add vinegar foam for sticky oil, and pick a peroxide gel or overnight poultice for scorch. Always wipe with clean water and buff dry; on gas ranges, soak grates separately and keep igniters dry.
Can baking soda scratch a glass stovetop?
Used as a soft paste with light pressure and a microfiber cloth, baking soda is considered a low-risk cleaner for glass-ceramic. The key is dwell time and gentle motion. Avoid gritty add-ins like coarse salt on pristine glass, and always rinse and buff to finish.
Is it safe to mix baking soda and vinegar on my cooktop?
Yes for most enamel and glass tops, when used briefly to foam and lift residue. Keep the reaction controlled (mist, don’t pour), avoid bare aluminum trim, and never flood electrical components or gas igniters. Wipe with clean water afterward to remove any residue.
How long should I let the paste sit on burnt-on food?
Start with 10–15 minutes for typical rings. For carbonized spills, extend to 20–30 minutes or use an overnight poultice covered with plastic wrap. If buildup still resists after two cycles, escalate to the hydrogen peroxide gel or schedule a professional deep clean.
What’s the best way to clean gas stove grates with baking soda?
Soak grates and caps in hot water with 1/4 cup baking soda for 20–40 minutes, then scrub with a nylon brush. Rinse and dry fully before reassembly. Keep igniters and gas orifices dry. While grates soak, clean the cooktop with paste so the surface and parts finish together.
When should I call a professional cleaner?
If scorch marks persist after two DIY cycles, if you see fine scratching or haze on glass, or if spills reached control seams or igniters, book a professional. HAARSH KLEAN handles appliance cleaning alongside deep kitchen resets with flexible evening or weekend appointments.
Methodology: how we tested and what we prioritized
We prioritized low-risk, repeatable methods that work in real homes: short dwell times, minimal tools, and safe contact on glass-ceramic, enamel, and stainless steel. Each method was ranked for mess type, effort, dwell, and finish quality.
- Surfaces: Glass-ceramic, enamel, and stainless panels common in Saskatoon homes.
- Soils: Fresh oil splatter, dried starches, caramelized sugars, and circular scorch.
- Metrics: Time-to-clean, passes required, visible film after drying, and streak resistance in daylight.
- Constraints: No harsh abrasives, no metal scouring pads, and protect electronics/igniters.
Conclusion and key takeaways
Baking soda delivers a safe, effective way to clean a stove top with minimal scrubbing. Use paste and dwell time, escalate method to match the mess, and finish with a microfiber buff. Treat gas grates separately, keep igniters dry, and repeat light resets weekly.
- Start light: 2:1 paste, 10–15 minutes, and a microfiber wipe.
- Escalate by need: vinegar foam, dish soap blend, peroxide gel, or overnight poultice.
- Protect the hardware: separate gas parts, avoid flooding seams and electronics.
- Finish strong: rinse cloths often and buff dry for a streak-free shine.
- Need help? Our Appliance Cleaning service resets ovens, cooktops, and more—backed by a 100% satisfaction guarantee.
Next step: Book a kitchen-focused appointment in Saskatoon and we’ll pair a meticulous cooktop reset with inside-oven, microwave, and refrigerator cleaning—scheduled on evenings or weekends to suit you.
HAARSH KLEAN
Need help keeping your home clean?
Book professional residential cleaning in Saskatoon and surrounding areas. Same cleaner, personal service, and a clean home you can actually enjoy.
Get Free Quote