
Oven cleaning tips are the proven methods, safety steps, and routines that remove baked-on grease and odors so your oven cooks evenly and safely. In Saskatoon, HAARSH KLEAN’s appliance cleaning service uses these tips to help you decide what to DIY and when to bring in a pro for a like-new finish.
By Harsh Kewlani, HAARSH KLEAN • Last updated: May 9, 2026
Above the Fold: Why This Guide + Table of Contents
This complete guide shows you exactly how to clean any oven—step-by-step, safely, and without harsh fumes. You’ll learn natural and advanced methods, pro tools, troubleshooting fixes, and local tips for Saskatoon homes, plus when HAARSH KLEAN’s appliance cleaning is the smarter, faster option.
- Quick Summary
- What Is Oven Cleaning?
- Why Oven Cleaning Matters
- Prerequisites & Safety
- Tools & Materials
- Step-by-Step (Baking Soda + Vinegar)
- Methods & Approaches Compared
- How Degreasing Works
- Troubleshooting
- Essential Oven Cleaning Tips
- Case Studies (Saskatoon)
- Tools/Resources & When to Call a Pro
- FAQ
- Key Takeaways
- Conclusion & Next Steps
Quick Summary
For light buildup, use a baking soda paste and vinegar rinse. For heavy grease, add a short steam cycle or a targeted degreaser. Always remove racks, protect gaskets, ventilate well, and test on a small spot first. If burned-on carbon remains, consider a professional deep clean for safer, faster results.
Ovens accumulate polymerized oil and carbonized food. That buildup creates smoke, odors, and hot/cold spots. A realistic cadence is quick wipe-downs weekly, door-glass touch-ups biweekly, and full cleans every 1–3 months depending on cooking frequency and splatter-heavy dishes.
What Is Oven Cleaning?
Oven cleaning is the removal of grease, carbon, and food soils from the cavity, racks, door glass, and seals. Effective cleaning restores even heating, reduces smoke and odors, and protects components like gaskets and thermostats for longer appliance life.
In practice, it’s a sequence: cool-down, disassembly (racks, trays), soil-loosening (paste, steam, or cycle), mechanical agitation, rinse, and dry. For glass and enamel, pH matters: alkaline solutions break down fatty soils; mild abrasives help without scratching when used correctly.
In our Saskatoon work, we’ve found most household ovens respond well to an alkaline dwell (8–10 hours) paired with light abrasion. This limits fumes, protects enamel, and reduces the chance of haze on door glass. It’s reliable across brands and ages when done with patience.
Why Oven Cleaning Matters
A clean oven heats more evenly, smokes less, and keeps food tasting like food. Heavy residue can trigger smoke at 375–425°F, create hot spots that overcook edges, and transfer burnt odors to new meals—issues you can prevent with routine care.
- Cooking quality: Even heat reduces underdone centers and scorched edges. Consistency matters when you’re baking bread or roasting veggies at 400°F.
- Less smoke: Residue can smolder at typical roasting temps. That’s why a quick weekly wipe drastically cuts preheat smoke.
- Longevity: Clean gaskets and fans work efficiently, helping parts last and reducing strain on electronics.
- Hygiene: Grease films hold odors that transfer to future bakes. Fresh surfaces mean neutral flavors.
Ventilation is part of the picture. If you’re evaluating hood filter hygiene, these practical hood filter pointers can help reduce cooking smoke while you maintain the oven itself. Pairing filter care with cavity cleaning keeps preheats cleaner and quieter.
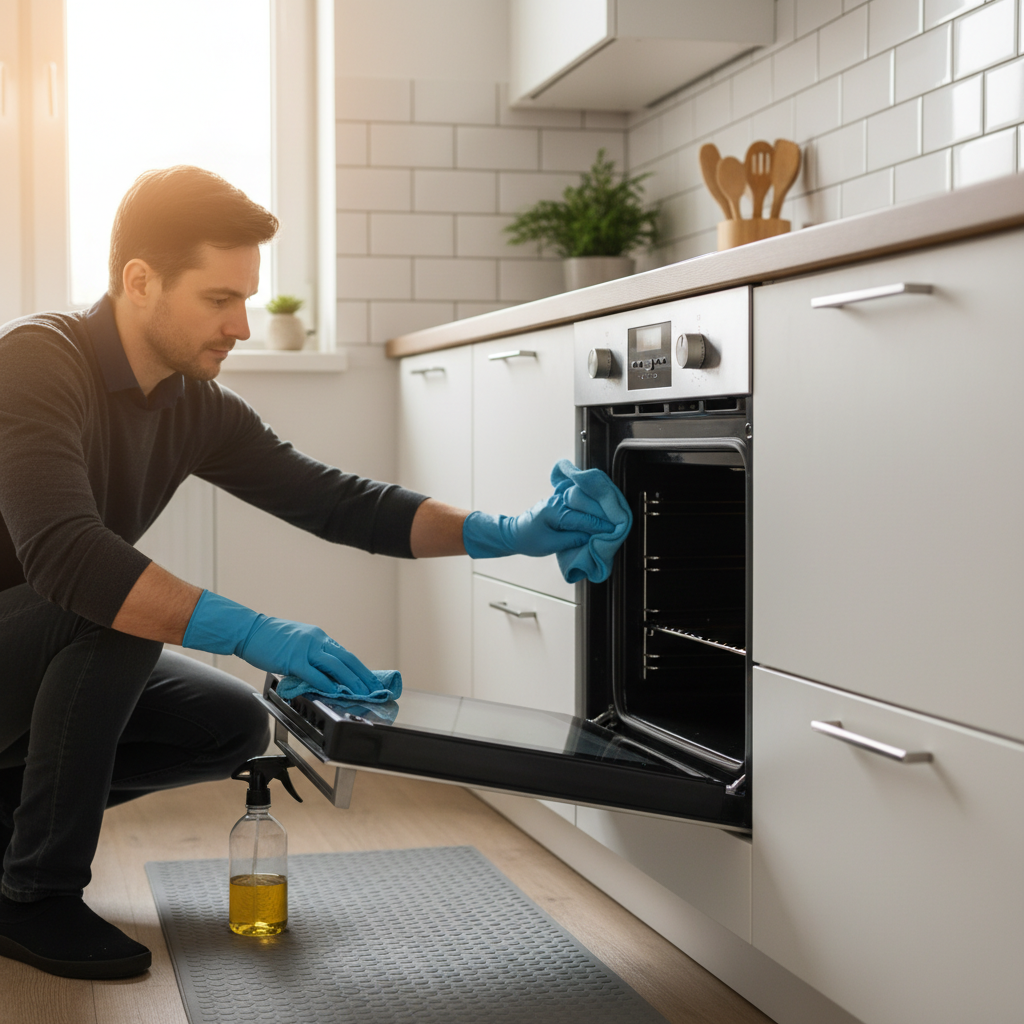
Prerequisites and Safety
Start with a cool, powered-off oven, removed racks, good ventilation, and protective gloves. Avoid mixing chemicals, protect door gaskets, and spot-test cleaners. Keep kids and pets out of the kitchen until surfaces are rinsed and dry.
- Power and heat: Switch the oven off and let it cool fully. A cool surface prevents burns and preserves enamel during scraping.
- Prep the area: Open a window or run a fan; lay down a washable mat. Good airflow reduces lingering odors from lifted grease.
- Personal protection: Wear nitrile gloves and optional safety glasses. This is especially helpful for sensitive skin.
- No mixing: Never mix bleach with ammonia or acids. Stick to one chemistry at a time to avoid hazardous reactions.
- Gasket care: Clean door seals gently with mild soap; avoid strong alkali on rubber and decals to prevent deterioration.
- Appliance manual: Check your model’s cautions before running a self-clean cycle or removing elements.
Safety quick checks
- Confirm pets and kids can’t access the work zone during dwell time.
- Test any new cleaner on a small, hidden spot first.
- Keep metal scrapers off enamel; use plastic or nylon tools.
Tools and Materials
You need an alkaline cleaner (baking soda paste or degreaser), non-scratch pads, microfiber cloths, a plastic scraper, and a spray bottle for water or vinegar. For tough jobs, add a steam cycle or portable steamer to soften polymerized grease before wiping.
- Core kit: Baking soda, white vinegar, spray bottle, plastic scraper, microfiber cloths. Simple, safe, and low-fume.
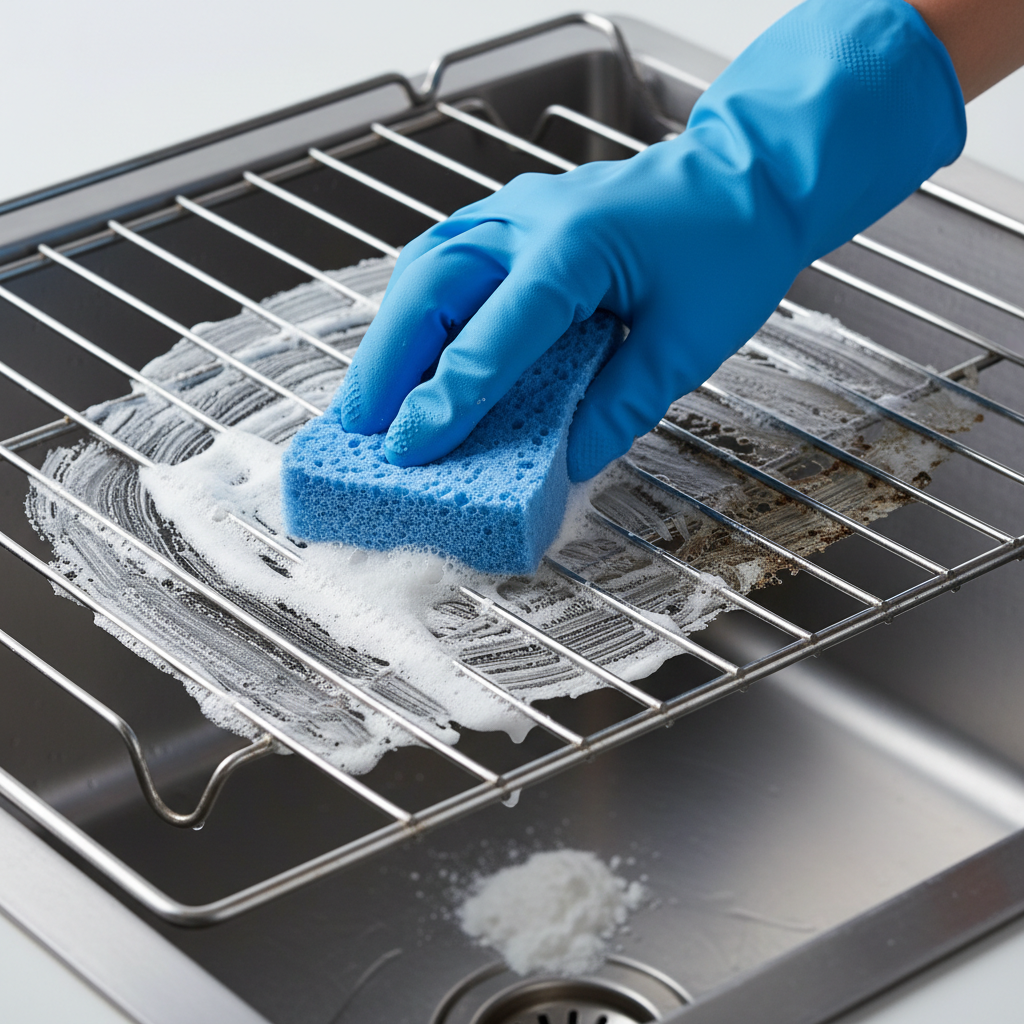
- Agitation: Nylon or melamine pads; avoid steel wool on glass and enamel to prevent scratches.
- Racks: Large tub or bathtub liner for soaking; hot water + alkaline cleaner to break down baked-on fats.
- Steam assist: Heat-safe pan of water at 225–250°F or a handheld steamer for stubborn films.
- Optional: Citrus-based degreaser for hinges and corners; a razor for glass at a shallow angle (30–45°).
Eco-friendly options
- Stick to baking soda and mild dish soap when fragrance sensitivity is a concern.
- Use reusable microfiber and a washable floor mat to reduce disposable waste.
- Opt for distilled water on final rinses to minimize streaks on glass.
Step-by-Step: Natural Method (Baking Soda + Vinegar)
For everyday soil, spread a baking soda paste, let it dwell 8–10 hours, then spray vinegar and wipe. This low-fume method lifts grease chemically and mechanically, protecting enamel and glass when you use gentle pressure and rinse thoroughly.
- Remove parts: Pull racks and trays; soak them in hot water with dissolved baking soda to jump-start degreasing.
- Mix paste: Combine 1/2 cup baking soda with warm water to a spreadable consistency.
- Apply: Coat the cavity, steering clear of heating elements and sensors per your manual.
- Dwell: Leave 8–10 hours (overnight). Dwell time does most of the work without heavy scrubbing.
- Spritz vinegar: Mist to activate fizz that loosens residue and neutralizes leftover alkali.
- Wipe: Use microfiber; reapply paste on stubborn spots and keep pressure light.
- Detailing: Use a plastic scraper on edges and corners; clean the door glass last to prevent grit scratches.
- Rinse: Wipe with clean water until residue is gone; dry with a towel to reduce streaks.
- Reinstall: Dry and return racks; run a brief 10-minute warm cycle to clear moisture.
Time-saving variations
- Do a 20–30 minute pre-steam at 225–250°F before applying paste to soften grime.
- Tackle the door glass separately with a shallow-angle razor and soapy water.
- Split the job: paste on Friday evening, wipe and rinse Saturday morning.
Methods and Approaches Compared
Use baking soda for routine care, steam for softening heavy grease, self-clean for periodic resets, and targeted commercial degreasers for edges and grates. Match the method to soil level, ventilation, and your oven’s manual to protect finishes and electronics.
| Method | Best For | Time | Fumes | Notes |
|---|---|---|---|---|
| Baking soda + vinegar | Light–moderate grease, weekly/quarterly care | Overnight dwell + 30–60 min wipe | Very low | Protects enamel and glass; repeat on stubborn spots |
| Steam assist | Softening baked-on films before wiping | 20–40 min | Low | Pan of water at 225–250°F or a handheld steamer |
| Self-clean cycle | Heavy, whole-cavity resets | 2–5 hours | High heat odors | Remove racks; ensure strong ventilation; check manual |
| Commercial degreaser | Edges, hinges, grates (spot use) | 10–30 min | Varies | Follow label; avoid contact with gaskets |
For more background on professional approaches, see this overview of deep cleaning methods. While focused on commercial gear, the principles—soften, break, lift, rinse—translate well to residential ovens with gentler products.
How Oven Degreasing Works (Plain English)
Grease is mostly fats that turn sticky and carbonize with heat. Alkaline cleaners break fat molecules; steam softens the film; gentle abrasion lifts residue. Combining chemistry, heat, and agitation removes buildup without damaging enamel or glass.
Cooking oils polymerize above roughly 400°F, forming a varnish-like layer that traps new splatter. Alkaline solutions (baking soda sits around pH 9) convert fatty acids to soap, making them easier to rinse. Steam adds expansion and condensation, loosening the bond so microfiber can pick it up safely.
In our experience, three passes beat one aggressive pass: a soften step (steam), a chemical step (alkali), then light mechanical action (nylon pad). This sequence protects finishes and lowers the chance of hairline scratches on door glass.
Troubleshooting: Streaks, Smells, and Stubborn Spots
If glass streaks, reduce product and buff dry. If odors linger, run a 15-minute 250°F dry-out after rinsing. For tar-like patches, steam first, then re-apply paste and scrape gently. Persistent smoke often signals residue under the racks or on hidden edges.
- Cloudy door glass: Use less product; finish with distilled water and a dry microfiber crosshatch buff.
- Rubber gasket film: Switch to mild dish soap and water; avoid strong alkali on seals.
- Smolder smell on preheat: Check the lower corners and under drip shields for hidden residue.
- Streaks after drying: Buff with a clean, dry microfiber; change cloths often to avoid re-deposit.
- Still smoking at 400°F: Inspect under elements (if removable) and the broiler pan; repeat pre-steam, then paste.
When smoke persists
If you’ve done a thorough wipe and a short dry-out cycle but still notice smoke, residue is likely in a protected nook—hinge recesses, under a lip, or on the fan shroud. Pre-steam again, target those edges with a nylon detail brush, and follow with a clean-water rinse.
Essential Oven Cleaning Tips That Actually Work
Catch spills fast, pre-steam before scrubbing, and clean glass last. Keep abrasives off decals and gaskets, and finish with a low-temp dry cycle. Build a simple cadence: quick wipe weekly, glass biweekly, full clean every 1–3 months depending on cooking volume.
- Line smartly: Use a rimmed sheet under pies; skip foil on the oven floor to protect airflow and sensors.
- Pre-steam: 20–30 minutes at 225–250°F with a water pan softens grime for gentler wiping.
- Work top-to-bottom: Let gravity pull loosened soils downward where you’ll finish last.
- Glass last: Prevents grit from scratching during your final polish.
- Vent well: Run a fan and crack a window during any deep clean for a fresher kitchen.
- Protect finish: Use nylon tools and plastic scrapers—avoid metal on enamel and glass.
Case Studies: Real Saskatoon Homes
We’ve cleaned hundreds of ovens in Saskatoon. The winning pattern is pre-steam, targeted alkaline paste, and careful detailing on glass and gaskets. This sequence removes visible residue in under an hour after dwell time and prevents odors on the next preheat.
- Busy family kitchen: Weekly sheet-pan nights left drips that smoked at 400°F. Our pre-steam + paste method cleared the smoke source and stabilized bake times, so dinners stopped tripping the alarm.
- Move-out reset: Carbonized patches resisted basic wiping. A handheld steamer plus nylon pad lifted the film without scratching enamel—ideal for between-tenant deep cleans.
- Seniors’ condo: Fragrance sensitivity ruled out heavy chemicals. Baking soda workflows and extra rinsing delivered a fresh oven without strong scents.
- Vacation home turnover: Long dwell plus a final dry-out cycle eliminated a persistent “old grease” odor before guest arrival.
Tools/Resources and When to Call a Pro
DIY handles light-to-moderate soil. Call a pro for heavy carbon, failed self-clean cycles, or if fumes are a concern. Pros bring commercial-grade degreasers, steamers, and detailing skills that cut hours into a single efficient visit with predictable outcomes.
If your oven still smokes after a careful DIY, or if glass scratching is a worry, professional appliance cleaning prevents damage and restores performance. Pair it with a seasonal deep clean for a full-kitchen refresh and a more consistent bake. For a look at pro workflows, scan this deep cleaning process overview used in higher-volume settings.
Local considerations for Saskatoon
- Winter windows stay closed longer; plan deep cleans when you can ventilate well or schedule professional help to manage airflow.
- Holiday baking spikes grease. Add a maintenance clean before and after peak cooking months to prevent smoky preheats.
- Rental turnovers peak in summer. Combine oven cleaning with whole-home deep cleaning to reset kitchens between tenants efficiently.
Oven Cleaning FAQ
Most ovens benefit from a full clean every 1–3 months, with quick wipe-downs weekly. Use alkaline cleaners on grease, avoid abrasive pads on glass, and ventilate well. For burned-on carbon or odor after cleaning, pre-steam and repeat or call a professional.
How often should I clean my oven if I cook weekly?
Do quick wipe-downs weekly and a full clean every 1–3 months. If you roast or bake frequently at 375–425°F, oils polymerize faster, so plan monthly deep cleans to prevent smoke and hot spots.
Is the self-clean cycle safe for my oven?
Self-cleaning is effective but intense. It can exceed 800°F, which requires strong ventilation and removing racks first. Check your manual for model-specific cautions and avoid if you notice odors affecting sensitive family members.
What’s the best way to clean oven racks?
Soak racks in hot water with dissolved baking soda to loosen grease, then scrub with a nylon pad. For heavy soil, add a short steam step in the closed oven first to soften residue before removing racks to the tub.
Can I use commercial oven cleaner on glass and gaskets?
Use commercial cleaners sparingly and keep them off rubber gaskets and decals. For glass, use a razor scraper at a shallow angle and a mild cleaner to avoid scratches and haze.
Key Takeaways
Match the method to the mess, ventilate well, and protect sensitive parts. Baking soda handles most jobs; steam and targeted degreasers finish the rest. If smoke or odors persist, professional appliance cleaning restores performance quickly and safely.
- Weekly wipe-downs prevent smoke and odors later.
- Pre-steam makes scrubbing faster and gentler.
- Protect gaskets; clean glass last with light pressure.
- Call a pro for heavy carbon, odor that won’t quit, or post-renovation dust.
Conclusion & Next Steps
A clean oven cooks evenly and smells fresh. Build a simple routine, keep ventilation in mind, and use gentle tools. When DIY isn’t enough, professional appliance cleaning resets your kitchen fast so you can get back to cooking with confidence.
Prefer to skip the fuss? Pair an oven refresh with a seasonal deep clean to reset your kitchen in one visit. Evening and weekend scheduling keeps your routine on track—backed by our make-it-right 100% satisfaction commitment.
HAARSH KLEAN
Need help keeping your home clean?
Book professional residential cleaning in Saskatoon and surrounding areas. Same cleaner, personal service, and a clean home you can actually enjoy.
Get Free Quote